Much like the shift from winter to spring transforms our outside world, painting your walls is a great way to transform your inside space. Even if temperatures aren’t warming today or this week, the ability to open our windows before it gets too hot and humid is coming! And it’s a perfect time to think about tackling this task.
Sure, you can leave this job to the pros, but painting is one of those home improvement items that are relatively easy to do yourself, cost effective and provide a sense of satisfaction while freshening or even overhauling the look of your rooms.
To get you going, here are some tips on things to consider, how to get started if you’re new to painting, and maintaining your newly painted spaces.
Eggs and satin?
There are as many colours and types of paint out there as there are colours in the rainbow and not all paint is created equally.
Sheen: Paints typically come in about five sheens, which describe how much shine they have – flat or matte, eggshell, satin, semi-gloss & high-gloss. The less sheen (flat, eggshell) the less they reflect light, the more subtle their appearance on the wall and the less scrubbing they can handle.
 Certain sheens have become popular in certain rooms, such as lower sheens for living rooms, dining rooms and bedrooms (although maybe not a small child’s room) and higher sheens for high-traffic areas like hallways, bathrooms and kitchens, as well as trim and cabinetry.
When determining what sheen to choose, consider the room’s purpose and how durable the walls will need to be. While there are washable flats, for instance, a better choice for a kitchen – arguably the busiest room in the home – would be a satin finish at least. And for rooms where you like the look of a flat paint but need the washability of a gloss, often an eggshell finish can be a good compromise.
Primer: Unless you’re going with a higher-end paint, like our favourite Benjamin Moore, there’s not much difference when it comes to your average hardware store paint in terms of performance and durability. But there is a difference in primer, which is the undercoat you apply before your wall colour. Poor-quality (or the wrong type) of primer is more likely to ruin your paint job than your top coat will, and it’s also the area people are more likely to skimp on.
Primer is a great problem-solver that’s more like glue than it is like paint. You use primer to seal bare drywall, cover stains and minor blemishes on walls and when there’s a drastic switch of colours for the walls (ie., going from a dark to a light colour and vice-versa).
What type of primer to use will depend on what you need it to do. Your paint supplier can advise you.
But what about paint and primer in one? This is where the higher-end brands shine, but there are others that combine the two and those are fine if you already have a clean, smooth surface. But if there are any issues with the wall or it’s been more than eight years since you last painted, go with a separate primer.
It’s all in the prep
Painting your walls is half preparation and half actually painting. The prep work is that important, particularly in an older home that may have had rushed paint jobs in the past.
Patch: Use spackling compound for small damage (a nail hole); sandable, setting-type compound for bigger holes; and latex caulking for filling cracked areas that need to remain flexible.
Sand: Any patched areas or minor blemishes in the walls should be sanded, as should cracked and flaking paint. Painting over flaking paint will simply pull the old paint off the wall and ruin your new paint job. It’s also a good idea to sand all trim with a sanding sponge to remove dirt and imperfections. (A sponge will more easily conform to the trim’s curves and crevices.)
Wash: Once you’ve patched and sanded, give everything a wipe with a damp cloth to make sure you’re creating a clean, dry surface for the new paint. Things like grease spots can be washed with soap and then rinsed.
Cover: It’s crucial to protect your furniture, floors and fixtures when painting. Use drop cloths generously, remove cover plates on outlets and cover doorknobs with a sandwich bag secured with tape.
 Your tools
The better the quality of brushes, rollers and masking tape you use, the better the results you’ll see. Microfibre rollers, for instance, outperform others, but it’s important to choose the right roller for the right conditions. Painting a stippled ceiling, for instance (where you would want a higher nap) should not be done with the same type of roller you’d use for a smooth wall (where you’d choose a low nap).
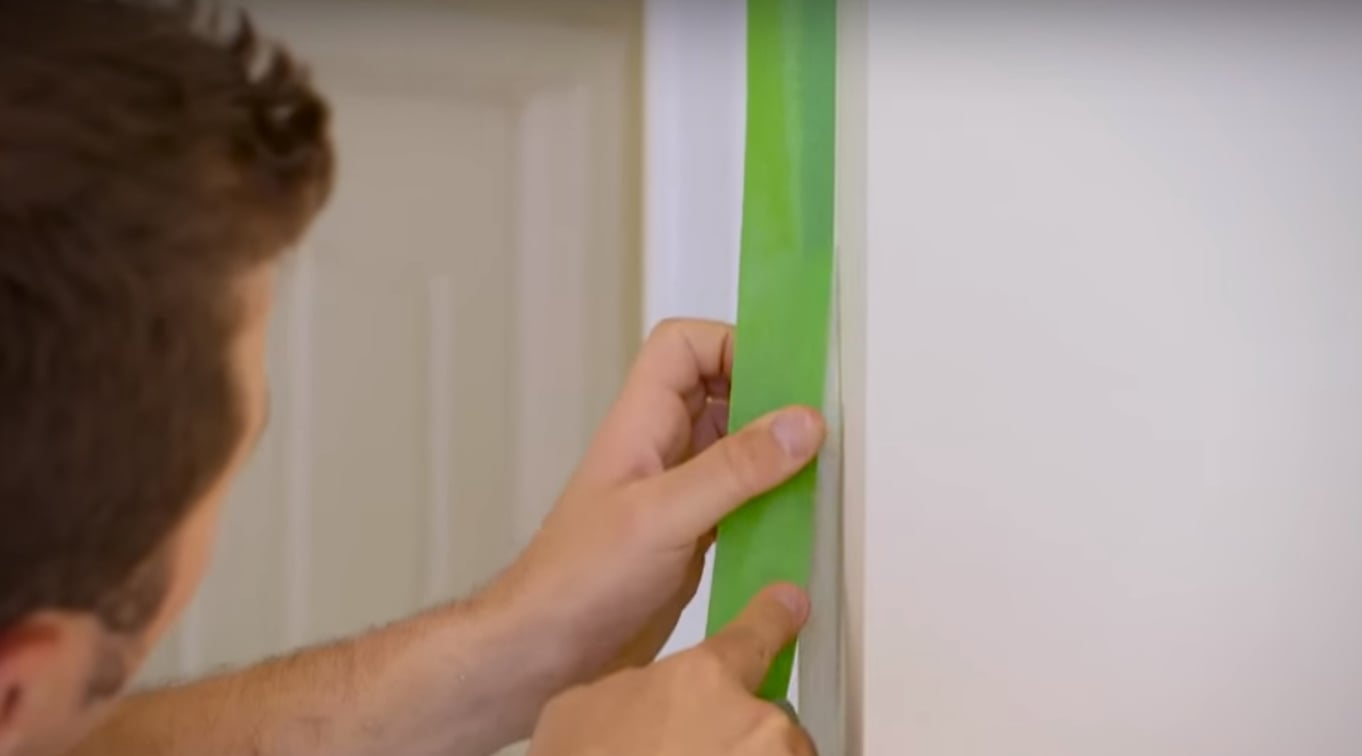
And when it comes to masking tape, it’s worth it to spend the extra on a good quality painter’s tape to get a crisp, clean edge when painting.
Tip: Seal critical edges of the painter’s tape by pressing with a putty knife or credit card. Your finger won’t create a reliable seal, which means paint could bleed underneath.
If you watch any home improvement shows, you may notice that the pros rarely use tape. It takes practice to paint crisp edges with a brush alone, but it does save time not having to tape a room first. If you want to try it, the key is to keep a bead of paint along the edge – and have a steady hand.
 Ready to paint
After all of this, the actual painting doesn’t take long. Some things to keep in mind when you’re painting:
- If you buy enough paint for the whole job at the beginning, consider combining all the cans together in one larger container. This allows for a more consistent application of your colour. Of course, it also makes for a heavier container to manage, so you’ll want one with an easy pouring spout.
- Do your cutting first. That means edging the ceiling and trim with your brush first, then follow with your roller.
- Use an extension pole to maximize the area you can reach with your roller and minimize the strain on your back. This also allows you to more easily paint a section of wall from top to bottom, reducing the chances of paint lines. And start from the ceiling when rolling so that if there are any drips, you’re more likely to paint over them as you move down the wall.
- Once an area starts to dry, don’t go back over it or you’ll risk leaving roller marks.
- In between coats, save yourself time (and paint) by thoroughly covering your brushes and rollers with plastic wrap, sealing with an elastic band if needed, and storing them in the fridge. You can even leave them overnight. Just remember to let them return to room temperature before resuming painting.
Wall upkeep
Cleaning your newly painted walls will not only keep them looking beautiful, but can extend the life of the paint. Just make sure you wait at least two weeks before washing them.
When you do need to clean your walls, test your cleaning solution in an inconspicuous area first to make sure it won’t damage the paint film. Use a soft cloth or sponge with mild, soapy water or general-purpose household cleaner. Gentle pressure is OK when washing.
If you’re dealing with penetrating stains and marks, you can carefully use an abrasive cleaner and water or solution of household bleach diluted with water. Rinse with clean water.
 Touch-ups
It’s inevitable that you’ll get some nicks and dings over time. If the blemish needs a patch, you may need to feather that patch into the surrounding area to reduce abrupt changes in texture or visible humps in the wall.
If you don’t have leftover paint from the original batch, be sure to purchase new paint in the same colour and sheen. Often you can get just a testing size. If you are using original paint, have the can shaken at your paint store before using.
Use the same tool to apply the touch-up paint as was used to apply the original coat and carefully feather the touch-up into the surrounding area. Thinning the paint slightly is also a great tip to help it blend into the surrounding finish.
Painting your walls yourself may sound like a lot of effort, and it does take some time to do it right, but the satisfaction of the new look you’ll create for your space is well worth the work and it’s a great DIY project where you can save money.